Showing posts with label 1930 reproduction fabrics. Show all posts

Monday, March 23, 2015

Final Irish Chain Twist Blocks

It is hard to believe that we are already finishing up our last blocks on Happy Quilting's Irish Chain Twist Quilt Along.  It seems like we just got started!


Here are all five of my appliqued chain blocks.  Rather than follow the instructions for a raw edged applique, I decided to needle turn my seed shapes. It probably took a lot more time but hand sewing is something I really enjoy.


With all the blocks finished, I am assuming this week we will be sewing up the quilt top.  I searched my fabric for a backing and didn't come up with anything I liked.  But I did make a trip to my favorite LQS shop today and found that fun dark pumpkin printed with green Xs.  I think it will be perfect for the back - this quilt needs some color! 


 To see the blocks made by other quilters, you can go here.  There really some fun, bright fabrics being used!


If you are interested in more ways to follow me, you can find me on CraftsyFacebookPinterest, Bloglovin'FeedlyInstagramGoogle +, or get my blog sent right to your email inbox by entering your email address on the right sidebar!

  
Linking up:

Happy Quilting 

Friday, June 20, 2014

Saying Goodbye to the 1930's

Last November, I decided to purged my stash of all the 1930's reproduction fabrics and get them sewn into some quilts.  Most of the fabrics I had for years, others I had inherited along the way.  Some of the pieces were fat quarter size but many were smaller so I figured a couple of quick scrappy quilts and they would all be gone.  I could then move on to something new!


First there was this large log cabin lap quilt.  I figured making a very scrappy quilt would hopefully make a big dent in the fabrics.  Boy, was I wrong!


So I sorted up the remaining fabrics into some coordinating fabric piles.  The blue and red pieces were made into this large churn dash lap quilt.


 Still having some blues left and needing a class sample for a class I was teaching, I made this baby quilt using my Tangerine Dreams pattern.


The green, oranges and pinks went into one of my Scrap-A-Palooza quilts.
This one is a nice size lap quilt.


...and because I still had quite a few pieces in this colorway, I made a second variation for a baby quilt.


 That left the purples.  I was teaching my pattern again so I made another baby quilt for a class sample.


I still found myself with quite a few scraps in blue so this week I sewed up some string blocks and quilted up this final lap quilt.  While I still have the odd scrap piece, finally the stash of 1930 reproductions fabrics are all sewn up!  Woo Hoo!


I wish I had taken a photograph of the fabrics I started with.  It is hard to believe that little pile of fabrics made all of these quilts.  It just goes to show how far scraps will go!


http://www.bloglovin.com/blog/5198185


Friday, June 13, 2014

A Fun Time Teaching!

Recently, I had the pleasure of teaching my Tangerine Dreams pattern to a group of wonderful quilters at Our Sewing Room in Springfield Oregon. 
(The pattern was published in the Sept/Oct 2013 issue of Quilty magazine).  
It was a fun day spent with new friends!


Many of the students loved the colors in my original quilt so there was a lot of pretty gray and orange fabrics to look at.


Before the end of the class, everyone finished up the center block of their quilt. 
Here are a few photos of some pretty finishes and their shy makers.
One student even finished up two blocks.  She chose a more masculine colorway and pulled all the fabrics from her stash.  Everyone has promised to send me pictures of these quilts when they are finished.
As a class sample, I sewed along using up some more of my 1930's reproduction fabrics.  
(Boy will I be happy once all these fabrics are gone!)
Here is my cute little baby quilt all finished up.  Very sweet!


 As of right now, I don't have any quilting classes scheduled but I am hoping to line some up in the Eugene area for this fall.  I am hoping to organize a class or two that combine colorwork and playing with scraps.  As I get something scheduled, I will be updating my Classes page.  So if you are interested in taking a class, keep checking back or drop me a line.


http://www.bloglovin.com/blog/5198185


This is a Friday Finish so I will be linking this post with TGIFF, Richard and Tanya Quilts, Forth Worth Fabric Studio,Crazy Mom Quilts,  Sew Can She, and Confessions of a Fabric Addict.  Hope to see your finishes there too!

Thursday, February 20, 2014

Scrap-A-Palooza! Quilt #2 Part Three

When I looked at the calendar today, I couldn't believe that we're past the midpoint of February and quickly heading towards the end of the month! I've been feeling so productive lately but I still have a lot of things to finish up before the end of the month!  Guess I had better pick up the pace and turn off the Olympics for a few days.  Bummer.


Last week's assignment for the second quilt in our Scrap-A-Palooza series was to finish cutting up the squares, determine a size and lay the quilt out on the design wall.


This week we will start sewing and hopefully get this quilt top finished up.


As I said last week, this quilt starts with a pieced center. A rectangle like the one shown below will give you a rectangular quilt.  If you start with a square, your finished piece will also be square.


To start sewing the top, you begin by piecing up the center.  For my quilt, I went with a 2 by 5 block center.

The next step is to cut the sashing strips.  To determine the proper width for your sashing, take the cut size of your squares, subtract 1/2" (seam allowance), then divide by 2.  You will then need to add back in the 1/2" seam allowance.


For my quilt with 4.5" squares, my sashing is 2.5" wide.


I have learned from experience that it is a good idea to cut your sashing to length.  While it might seem like you can just sew the strips to the pieced center and trim, I find you get better results taking the time and cutting the strips.  As I am working with 4.5" squares, I know my finished size is 4".  So this means for the first ripple, my vertical strips are 20.5"  (Remember you need to add in that seam allowance.)  You can also use your cutting mat or a tape measure if you prefer that over the math.

Sew these strips onto the sides of your pieced center.  I pressed toward the sashing so I didn't have to press against all those seams.


The next step is to cut and sew the top and bottom sashings.  As the width of the sashing is half of a square, the two sashings sewn to the center will equal the width of one of your square.


For my quilt, I need a length of 12.5".  (or the equivalent of 3 squares)
 

The next step is to piece the squares for another "ripple".  For the sides, you will add one more square than the center.  If you cut your sashing width correctly, these will fit perfectly onto the sides.


Note:  I do take the time to add a couple of pins before I sew.


For the top and bottom, you will piece enough squares to fit across the top.  To get this number, add 3 blocks to the number of blocks you used in your center.


Once again, I pressed my seams toward the sashing.


Continue in this same method with enough "ripples" to get the size quilt you want.  I used my ironing board to pin the sashing strips to ensure they kept the quilt squared up.


After you sew the sides, continue by sewing the sashings to the top and bottom.


Before you know it, you will have a quilt top finished!  You can end your quilt with a pieced row or a sashing.


I ran out of the cream muslin at this point so mine is ending with prints around the edge.  
That is usually how I roll!


While I don't often heavily piece a backing, I decided to use up more of these fabrics for the back. 


Happily, all of these fabrics came from my stash.


In fact, as I cut the squares for the above top, I went ahead and trimmed up the scraps into 2.5" squares.  From them, I was also able to sew up this fun baby quilt using the same method.


In part three of each quilt, I always like to share some quilting ideas.  Amanda Jean at Crazy Mom Quilts, recently wrote a great tutorial on a spiral or oval quilting motif.  This would work perfectly on this quilt and can be done with a walking foot.


If you are wanting to try a little FMQing, a simple swirl would also work great.  Remember when swirling, the direction you start your "swirl" in is the direction you will be moving along on your quilt.  Keeping this in mind will help insure you don't quilt yourself into a corner.


Here's an overview of the important stuff to do before the next step!

  • Sew your pieced center
  • Cut and sew your sashing to the center
  • Continue adding "ripples" of pieced blocks and sashing until you reach the desired size of your quilt
  • Remember to pin each ripple to keep the quilt squared up.
  • Finish up the top and determine a backing!

I am still seeing some finishes on Scrap-A-Palooza Quilt #1.  I will share some photos soon so you can see what others are doing.  If you are joining in, I would love to feature your quilt so be sure and contact me soon.
 
See you next week with my finished quilts!


http://www.bloglovin.com/blog/5198185

I will be sharing this with the following linky parties. Needle and Thread Thursday at My Quilt Infatuation and Really Random Thursday at Live A Colorful Life, Let's Bee Social at Sew Fresh Quilts, and WIP Wednesday with Freshly Pieced.  Be sure and check out these blogs for even more quilty inspiration.

Wednesday, February 12, 2014

Scrap-A-Palooza! Quilt #2 Part Two

With this last bit of winter keeping many folks indoors, it is a great time to be tidying up those sewing rooms and sewing up those scraps. Last week we starting pulling our fabrics and cutting our squares for this month's scrap quilt.  This week we will start seeing our quilt top take shape!

Unlike Scrap-A-Palooza Quilt #1, this quilt will be staying up on your design wall as you sew it.  But I promise it goes together quickly and easily so you can get back to other projects real soon.


Many readers always ask "how much fabric do I cut?".  This is a hard question to answer because all of these quilts can be made to any size so the answer can be very different for each quilter.  While I went with a 4.5" square to get the best yield out of my scraps, the cut size can be adjusted - which will affect the final number of squares needed.  


But to provide a ballpark number, for my quilt that will end up about 44" by 56", I cut about 120 squares (at 4.5").  As you become more experienced with scrap quilting, you will get a feel for about how many scraps are needed for a quilt top.


Once you have some squares cut, you can start placing it on your design wall.  This quilt is laid out starting with the center. To set the final shape of the quilt, you need to start with a rectangular or square shape.

With a square center, you will end up with a square quilt.  To get a rectangular shape, you need to start with a rectangle.  I went with a 2 x 5 block center.  As this initial rectangle is 12" longer than it is wide (3 squares at 4" each), my finished quilt will be 12" longer than it is wide.

Now just start laying each ring of blocks out from the center.  The number of blocks in each side of a "ripple" will be 3 more blocks than the previous ripple.  For example, my side ripples started at 5 in the center and went to 8, 11, and 14 at the outer ring.


Challenge yourselves to get creative on this quilt top.  You can make your center pieced area larger (maybe 4 squares by 7 squares), you can replace the 4.5" squares with 4 patches made with 2.5" squares, or even play with color and make each ripple a different colorway.

Use your scrap quilts to really play with design and color!


As you lay out your blocks into a layout you like, start thinking about what fabric(s) to use in the sashing (or background) that will "ripple" around with the prints.

I will be keeping with a more traditional feel and be using a nice cream color muslin I already have in my stash.


Now off we go to finish cutting up our scraps and laying out our squares.
The next time we meet we will be cutting our sashing and sewing up the top.


Here's an overview of the important stuff to do before the next step!

  • Determine a layout (square or rectangular)
  • Layout all your squares on your design wall
  • Decide on a background or sashing material
  • And most importantly, get creative and have fun!

So let me know if you are joining in and tackling the scraps in your own sewing rooms.  I would love to include some pictures and links to your projects. Feel free to grab the button in the sidebar to share with your readers so they know what you are up to.
And if you have any questions, don't hesitate to contact me.

Now let's attack those scraps!


http://www.bloglovin.com/blog/5198185

I will be sharing this with the following linky parties. Needle and Thread Thursday at My Quilt Infatuation and Really Random Thursday at Live A Colorful Life, Let's Bee Social at Sew Fresh Quilts, and WIP Wednesday with Freshly Pieced.  Be sure and check out these blogs for even more quilty inspiration.

Monday, February 3, 2014

Scrap-A-Palooza! Quilt #2 Part One

Can you believe it is already February?  Time flies I guess when you are busy quilting along!


So here we are already starting our second quilt of my scrap series.  No worries if you haven't finished the last one.  There will be lots of opportunities to join in throughout the year.  If you missed the first quilt, I have created a Scrap-A-Palooza page which has a gallery of all the scrap quilts and links to all the posts.  When you are ready to sew up your scraps, you might be inspired by some of the quilts you see there.


I always find it interesting that as soon as I am finishing up one scrap quilt, I'm looking for inspiration for the next one. As I was cleaning out my sewing room and putting fabric back into my stash closet, I started sorting the 1930s fabrics that I have been trying to sew up.  Even with completing the Churn Dash and Log Cabin quilts, I still have quite a pile of scraps!


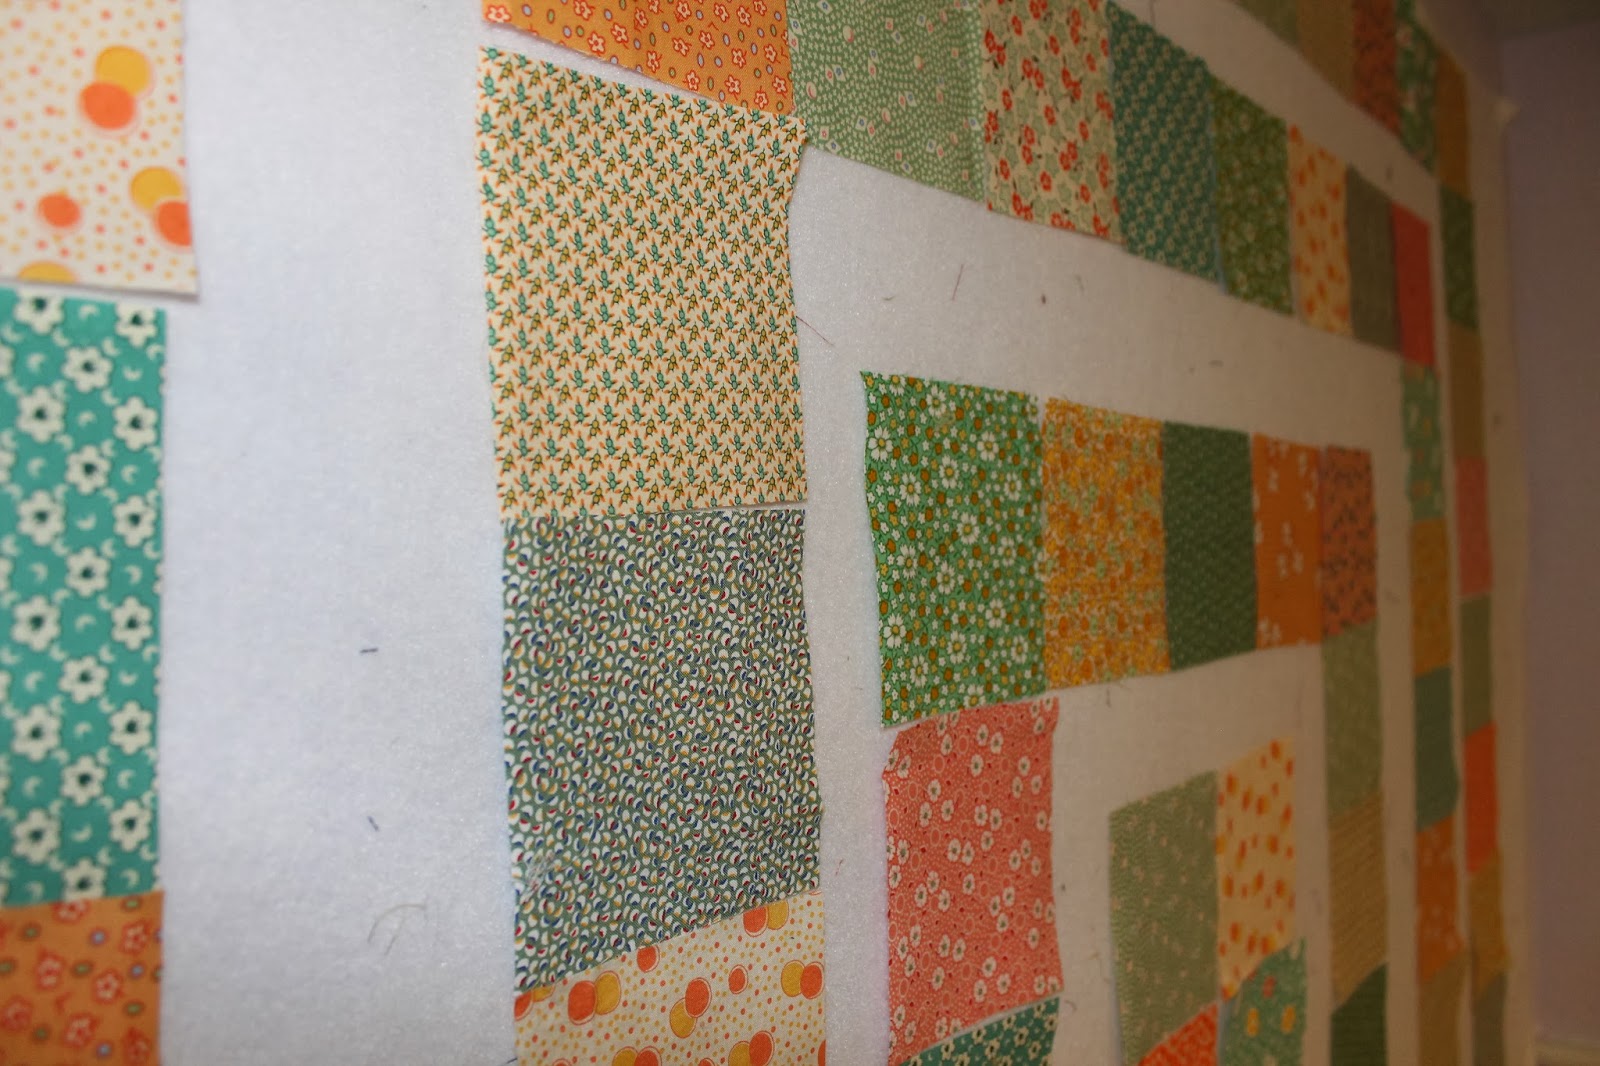
As I was folding them up, I was really enjoying how the green and orange fabrics looked together.  Before I knew it, I had quite a stack of fabrics all piled up and my fabrics for my next scrap quilt came together.

These scraps are what I refer to as "chunks".  Pretty much all of them are fat quarters that have been cut into for previous projects.  As I like to keep my scrap quilts simple with minimal cutting, I wanted to keep the pieces in this quilt fairly large.  My motto...The less cutting the better!


I also knew I was going to need some sort of sashing (or background) and I came across this leftover one yard piece of nice quality muslin.  Having a limited amount of fabric created a bit of a challenge but an idea was forming in my head and this piece would be just about enough.


My vision for this quilt is a scrappy patchwork quilt with a pieced center that "ripples out" alternating prints and backgrounds.

In my mind, I thought it would be fun to have the prints starting in the center and echoing out to the edges with the muslin in between, kind of like the ripples on a pond.  So now it is time to get cutting...


Almost all of my fabric pieces were 18" wide (as they started life as a fat quarter) so to get the best yield, I decided to cut my squares all 4 1/2".


To narrow the colors in the quilt, I kept to oranges, sage green and peachy pinks.  I also had a few fabrics that contained these colors on a light background.


I felt I had a nice array of colors and prints.


As I was cutting up the fabric, the pieces I couldn't cut to size, I cut up into 2 1/2" to store for later.  Then it came to me that this quilt could also be done substituting a cute little four patch in place of the larger blocks.


So if you store your scraps in 2 1/2" squares, this pattern would be perfect for your scraps!


So what do you say, are you ready to sew some more scraps?!?

As you sort through your scraps for inspiration, remember to narrow your fabric choices down to keep your quilt cohesive.  This is what I refer to as "naming the quilt". You are not giving your quilt a name, but you are defining the fabrics that will be used.  In my example, I have named this quilt my "1930's green and orange ripple quilt".  As I cut my scraps, I only used fabrics that would fit into that definition.  I truly think doing this is what helps to ensure a successful, eye-appealing scrap quilt.


Now off we go to finish cutting up our scraps. I will meet you back here in about a week and we will start laying out our quilts.

Here's an overview of the important stuff to do before the next step!

  • "Name your Quilt" or determine your quilt theme/colors
  • Pull your scraps/stash.  Think about what to use for the background fabric
  • Cut your scraps into desired chunk sizes or cut/sew up your 4 patches
  • And most importantly, get creative and have fun!

So let me know if you are joining in and tackling the scraps in your own sewing rooms.  I would love to include some pictures and links to your projects. Feel free to grab the button in the sidebar to share with your readers so they know what you are up to.
And if you have any questions, don't hesitate to contact me.

Now let's Party!


http://www.bloglovin.com/blog/5198185

I will be sharing this with the following linky parties. Anything Goes over at Serger Pepper, Linky Tuesday at Freemotion by the River, Let's Bee Social at Sew Fresh Quilts, WIP Wednesday with Freshly Pieced and Fabric Tuesday at Quilt Story.  Be sure and check out these blogs for even more quilty inspiration.

Lily's Quilts

Friday, January 17, 2014

Log Cabin Beauty

I am so pleased to share another finished quilt!  After I tallied up all the UFOs I had at the end of the year, out of embarrassment, I vowed to get some of these half finished projects checked off the list.


I just pulled this beauty out of the laundry so it is now ready to be loved.  It is the perfect size for some sofa snoozing at 52" x 68".  I might just have to try it out later this evening.


I quilted a fun daisy and loop pattern over the entire quilt in a beige thread.  I thought it would work well with the 30's prints used throughout the quilt (you can read more about the quilt top here.)


I was also able to find two larger cuts of some 30's fabric in my stash that worked perfectly for the backing.  Between the churn dash and this log cabin quilt, I am finally making a dent in my older reproduction fabrics.  It feels good to be making room for some fun, modern prints.
Now to figure out what to buy....

http://www.bloglovin.com/blog/5198185

I will be celebrating this finish with others at Can I get a Whoop? Whoop? over at Confessions of a Fabric Addict, TGIFF, LAFF at Richard and Tanya Quilts, Finish it up Friday at Crazy Mom Quilts, Show off Saturday at Sew Can She and A Stitch in Time at Such a Sew and Sew. 

January Finishes
01 09 10