Showing posts with label Quilt #9. Show all posts

Wednesday, December 7, 2022

Simple Starts

 Now that I am making quilts to donate to my local hospital, I have been looking around my sewing room for some simple starts for future quilts.  One of the first ideas I came up with was making some 16 patch blocks.


I cut my binding at 2.5" wide and I always save any leftover pieces in a scrap bin just for them.  I have been using a lot of striped bindings lately and I thought they would make some really happy blocks.


I am pairing them with some white/low volume scraps.  I also pulled some other bright colors to see how they looked.


I am not in any hurry to finish these blocks.  I can just work on them as I find fabric scraps that will work.  I might make one quilt - I might make many quilts out of these blocks.  
Only time will tell :)

Today I received my first few donation blocks in the mail.  It was so exciting!  

The response has been amazing and I am so happy I am going to be able to share a bunch of different layout ideas for such a simple block.  I have the first quilt from my blocks almost completed and I already have almost enough blocks to start on the second.

Thanks so much for the support!


Friday, September 26, 2014

Scrap-A-Palooza! Quilt #9 Part Four Finish

The temperatures are finally cooling down here in the Pacific Northwest and we finally had some rain!  Oh how I missed the rain!!
I am so delighted I chose to make a 16-patch for this month's Scrap-A-Palooza quilt.  Some people see Fall as a time to get out their sweaters and wellies, but for me, it sends a signal to my brain that I need a quilt to snuggle under.  And a scrappy patchwork quilt like this 16-patch starts the season off perfectly!
 
I found it interesting that I used this same process last fall to make three quilts.  Here is a shot of the blocks getting put up on my design wall as they were sewn.


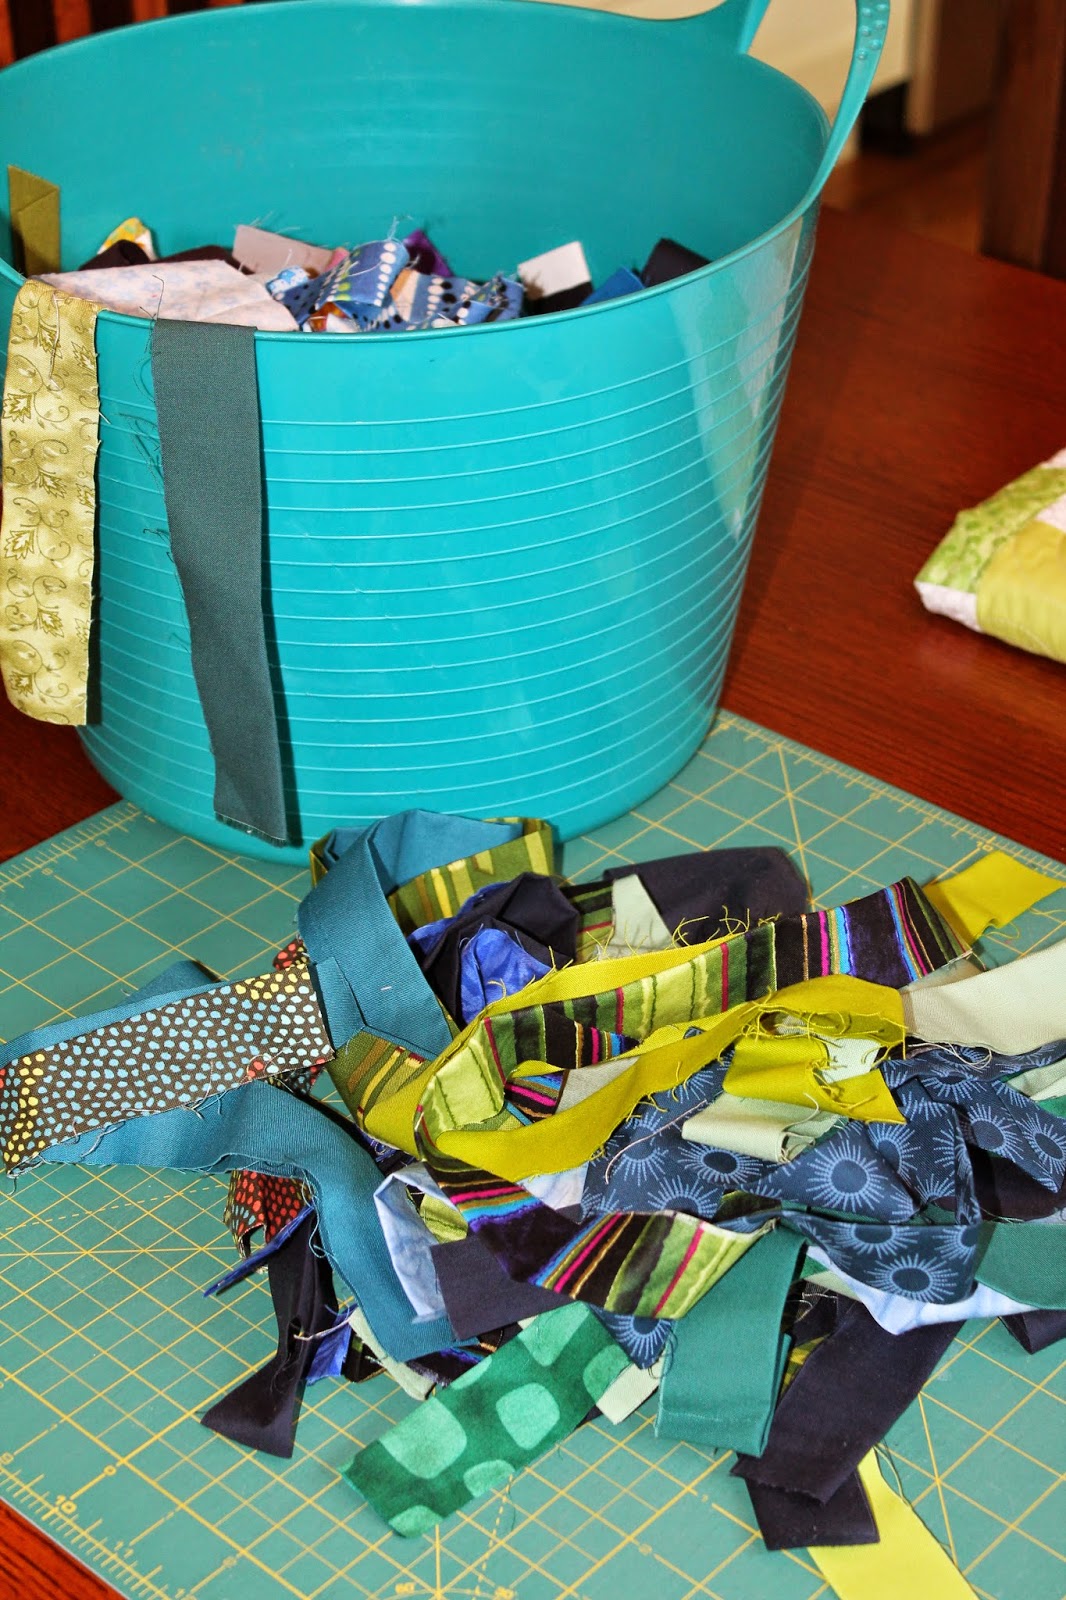
In Part One of this quilt, I shared how I seperate my leftover bindings and other 2 1/2" strips in a tub under my cutting table.  The bin was over flowing so that was the inspiration for this month's quilt.  


In Part Two, I shared a quick tutorial on how I sew up these blocks.


In Part Three, the blocks were finished up and a top was completed.  I also shared the process I use for balancing out colors when laying out a quilt.


Today, I am sharing the finished quilt!


And I even had some older fabric pieces I was able to use for the backing and the binding.

And now for a few statistics:
Size: 48 x 56"
Fabric: Leftover 2.5" binding strips. Each block has one print and one solid fabric
Total Pieces: Need 84 2.5" strips at least 21" long (makes 42 blocks)


100 Quilts for Kids 
Here is a photo of the 3 quilts I made last year.  All of these quilts went to support kids and I have decided to throw this month's Scrap-A-Palooza quilt on the pile getting donated to Bags of Love as part of 100 Quilts for Kids again this year.  The drive ends September 30th so get your quilts finished up and linked to Heather's blog at Quilts in the Queue.


Just a reminder, if you are ready to sew up some of your scraps, all of the quilts from the series can be viewed in the Scrap-A-Palooza quilt gallery tab above.  Not only can you see the quilt I made but I love to share what others have done.  There is all sorts of inspiration!


If you are interested in more ways to follow me, you can find me on Facebook, Pinterest, Bloglovin', Feedly, Instagram, Google +, or get my blog sent right to your email inbox by entering your email address on the right sidebar!

Tuesday, September 16, 2014

Scrap-A-Palooza! Quilt #9 Part Three

Ah September...you are flying by so very quickly!  With my customer quilting backlog taking up most of my time, I am just not getting into my sewing room this month as I had hoped.  I did make progress on this month's Scrap-A-Palooza quilt however!


In last week's post, I shared the process for making these blocks out of my leftover binding pieces (or 2 1/2" strips of fabric). These blocks really only take a few minutes to sew up.  In each block, I paired a solid fabric with a print - as long as it was green or blue, it went into the quilt.


As each block was sewn, I just added it to my design wall.  I like to start looking at the layout on my scrap quilts before I finish all the blocks.  This allows me to focus on making the last blocks in the colors I need to balance out the quilt a bit.


 For this quilt, I identified three types of blocks that stood out and needed moving a bit.  The bright turquoise, lime green and the lighter blocks.  I decided I needed to sew one more bright turquoise block and that I didn't like the lighter blocks toward the center of the quilt (so they were moved to the outer border).  I also moved a couple of lime green blocks around.  With just those minor changes, I started joining together the blocks.


 Here is the final layout all sewn up.  To think these blocks all came from leftover binding pieces...
What fun!


 It is even prettier in the sunlight!


Now to get it quilted up.  I am off to find some fabrics for the backing.  With so many colors, I know I will have something in my stash!
 
 
Quilting is more fun than Housework 
 
I Scrap-A-Palooza because Quilting is more fun than Housework!


If you are interested in more ways to follow me, you can find me on Facebook, Pinterest, Bloglovin', Feedly, Instagram, Google +, or get my blog sent right to your email inbox by entering your email address on the right sidebar! 
 
 
Linking up:


Thursday, September 11, 2014

Scrap-A-Palooza! Quilt #9 Part Two

September's Scrap-A-Palooza quilt is slowly building on my design wall.  Thankfully this month's blocks go together really quickly.  I have been finding so little time in my sewing room lately it is nice to spend just a few minutes in there and still see progress being made.


As I shared last week, this month I am sewing up all those leftover bindings and other 2 1/2" strips into 16 patch blocks. The colors I am working in are anything green and blue.  Because a number of my binding strips are solids, I thought I would use a solid and a print in every block.


Below, I have shared how I am putting my blocks together.


 I start out with two fabric strips at least 21" long.  Simply sew the strips together.  Before pressing them open, I fold the sewn strip in half and cut with my scissors.


You will end up with two pieces like this.  Now just sew these two together alternating the fabrics.  I now press all the seams in one direction (or open if you prefer).


 Once pressed, I use my 12 1/2" ruler to trim the block to width.  I align my ruler to the center seam, make a nice clean cut on the right side, then cut the piece into four 2.5" segments.


 Next you just flip the second and fourth segment to create a 16 patch.  Take this to the sewing machine and sew.


 Here is a finished block.  It measures 8.5".


 It has been quickly joined by a few more blocks on my design wall.  I am wanting to make 42 blocks for this quilt so I have quite a few more to sew.  Once I get about 3/4s of the blocks sewn, I will see if there are any colors I need to pull from my stash to help balance out the quilt.  Then I will work on final block placement.  I will share more on that next week!


 The "homework" for this week:  (Easy Peasy!)
  • Pair your fabric strips
  • Sew into blocks

Drop me a line if you are joining in so I can follow along on your progress.  I love to feature the projects of others - it is so fun to see what everyone comes up with.  Feel free to grab the button in the sidebar to share with your readers what you are up to.  
 
And if you have any questions, don't hesitate to contact me.
 
I Scrap-A-Palooza because Quilting is more fun than Housework!
 
 
If you are interested in more ways to follow me, you can find me on Facebook, Pinterest, Bloglovin', Feedly, Instagram, Google +, or get my blog sent right to your email inbox by entering your email address on the right sidebar! 
 
 
the Purge


Thursday, September 4, 2014

Scrap-A-Palooza! Quilt #9 Part One

Happy September everyone!  I think this is my favorite month out of the whole year.  
I love the cooler temperatures and watching the trees start to change.  
Plus, soon it will be quilt weather again...gotta love that!


As I near the finish of each scrap quilt, I am on the look out for inspiration for the next one.  In an older post on how I store my scraps, I shared I keep a seperate bin under my cutting table just for leftover 2 1/2" strips.  As I was dropping some leftover binding pieces in there, I noticed the bin is starting to over flow.  An overflowing bin is always a sign to plan a scrap quilt.


There is one pattern I love to make with my leftover bindings and it is a 16 patch.  Last October, I shared a post showing some of these scrap quilts in process.  I thought this month I would share in more detail how I put these together as part of the Scrap-A-Palooza series.

So my vision for this month's scrap quilt is to make simple 16 patch blocks from leftover 
2 1/2" strips and group them into a quilt. 


 Here are some examples of what I have made in the past.  These make great utilitarian or donation quilts.  In fact, I plan on donating this one as part of the 100 Quilts for Kids event going on until the end of September.  Want to join me?


To get started, I quickly viewed what I had in the bin and determined I had quite a few strips in the green and blue colorways.  So I think I will just pick out these colors to work with.  Next, I had to sort out the ones that were longer than 20" as this is the length we need.  Anything that was longer, I roughly trimmed to about 21".


 I then started to pair them up - one print and one solid in each pairing.  Each of these will make one block.  You can see I already have about 20 blocks ready to sew up.

These blocks will finish out at 8".  I would like this quilt to be about 50 x 60 so I will need to collect up enough strips to make about 48 blocks total.  I may have to cut up some larger scraps and unloved yardage to get enough for this quilt but I know I have lots of fabric in these colorways so that should not be an issue!
 
 
So to prepare for next week:
  • Pull your scraps/stash and determine what fabrics to use. 
  • Rough cut your strips to length and if you have time, pair them up

Note:  This pattern can also be made with wider strips if you have some on hand.  I hope to share a quilt soon that I am making with 3 1/2" strips.  Unfortunately, I ran out of solid black so I need to get some on order before I can proceed.

Drop me a line if you are joining in so I can follow along on your progress.  I love to feature the projects of others - it is so fun to see what everyone comes up with.  Feel free to grab the button in the sidebar to share with your readers what you are up to.  
 
And if you have any questions, don't hesitate to contact me.
 
Now let's Deal with Those Scraps!
 
 
If you are interested in more ways to follow me, you can find me on Facebook, Pinterest, Bloglovin', Feedly, Instagram, Google +, or get my blog sent right to your email inbox by entering your email address on the right sidebar! 
 
 
the Purge


01 09 10