I so enjoy seeing what others are doing with their scraps and as part of my Oh Scrap! series of posts, I want to share with you some of the projects I find (and the talented bloggers behind them).
Today, we are meeting Cassandra who blogs at The (not so) Dramatic Life. I first "met" Casandra when she won one of my recent giveaways. It just so happened she had just started her blog and remembering those early days of blogging when you mostly feel like you are talking to yourself, I thought I would support her and follow her blog.
Boy am I happy I did! She continues to inspire me with each new post.
Cassandra is currently working on a mini quilt series that I am fascinated by. So many great ideas!
Just before the holidays, Cassandra shared a tutorial on making cute little zippered coin pouches that are perfect little scrap projects because they require such small pieces of fabric. And when I asked her if I could feature them on my blog, she gave me permission to post the whole tutorial. Thank you Cassandra!
So I am just going to share Cassandra's post. Thank her for sharing by checking out her blog at The (not so) Dramatic Life and go ahead and follow along for some great inspiration.
Cord/Coin Pouch (Originally published December 20, 2014)
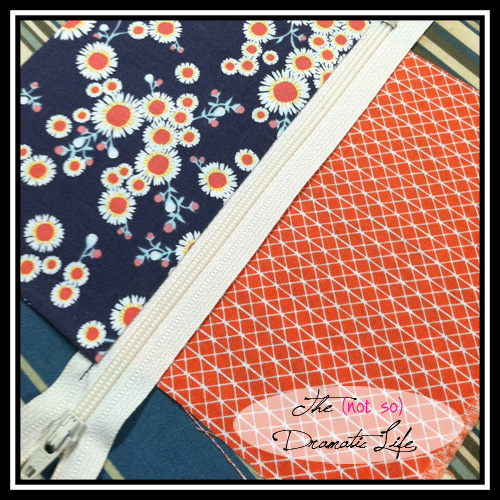
As my nieces and nephews have gotten older, cash or gift cards have become the favored gifts for the holidays because money always fits! I try to get a little creative in the presentation of this not-particularly-original gift, so this year I am making cord pouches that hook onto a keyring. These pouches finish at a little under 4″ from side to side, so they can easily hold a thumb drive, USB cord, some change, or even most phone chargers. Come to think of it, I may need to make a couple for myself!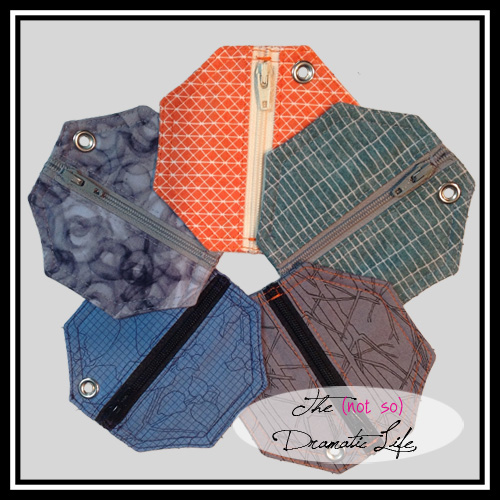
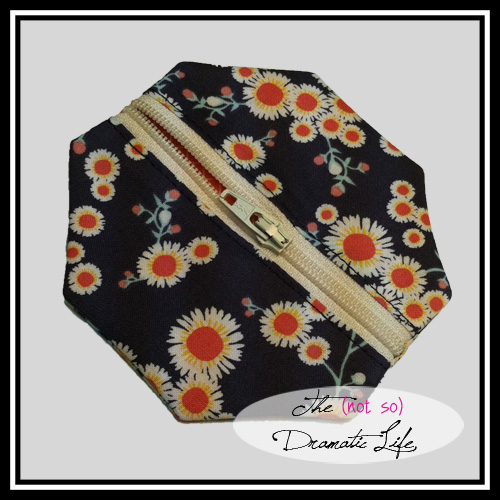
Finished Cord Pouches
I knew that I wanted to put a grommet in each pouch to attach a key ring. (If you don’t have grommets laying about, a ribbon loop inserted into a seam would also do the trick.) I thought that the grommet would look nice in a corner, so I experimented with a couple different shapes before settling on an octagon. This project will work with most shapes, but if you would like to play along using the octagon, I have included a pattern here. This Octagon Pattern is a PDF File you are welcome to download.
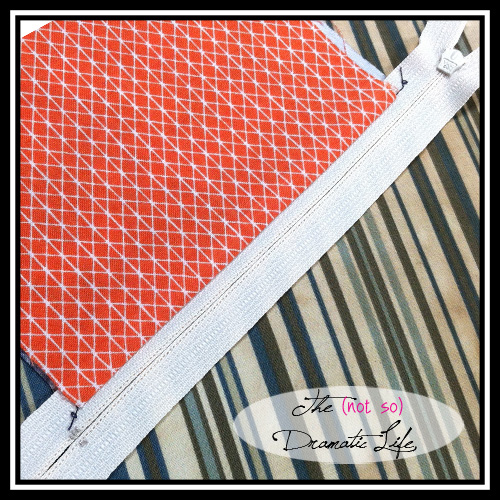
I made six pouches, choosing an outer fabric and a lining fabric for each. Orange tends to be pretty popular among my nephews, so I used a lot of it this year! I cut one octagon out of each fabric, but for the front side I cut rectangles to set the zipper into before cutting it into shape. I like to give myself some wiggle room when dealing with zippers, so I cut the rectangles to about 3″x5″. For each pouch you should have 2 outer fabric rectangles, 2 lining fabric rectangles, 1 outer fabric octagon, and 1 lining fabric octagon. You will also need a zipper and either a grommet or a small loop of ribbon.

Pieces cut for cord pouches
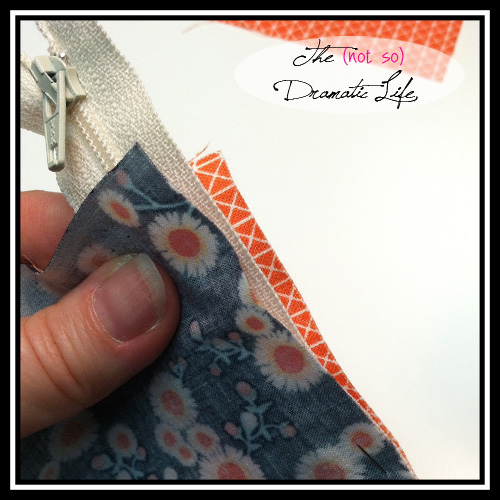
A “Zipper Sandwich”
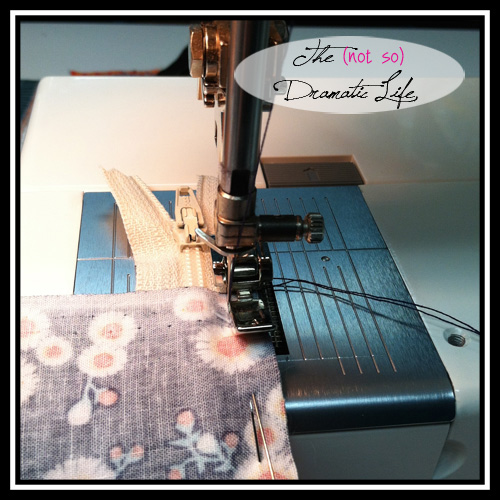
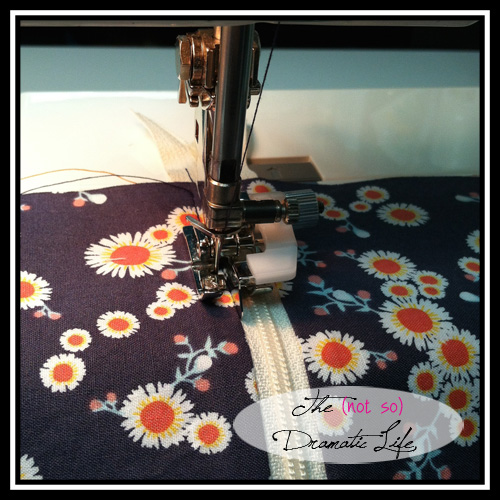
Using the zipper foot to stitch a zipper in place
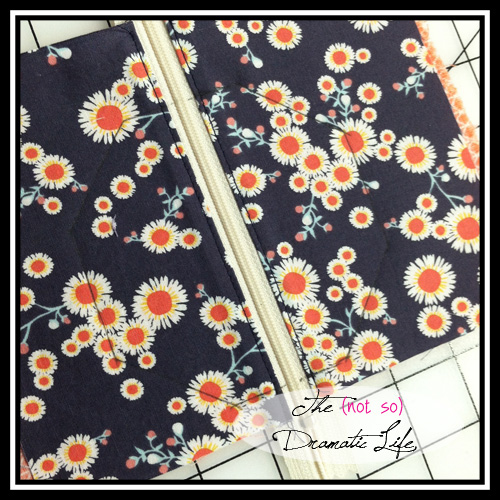
Pressing the outer fabric into place around the zipper
Fabric Pressed in place once the zipper is sewn
For added stability, I like to topstitch the fabric about 1/16″ from the seams we just sewed. If you have an edge stitching foot, it will make this step easier, but it can also be done with a regular foot (and a little patience!)
Top Stitching the zipper
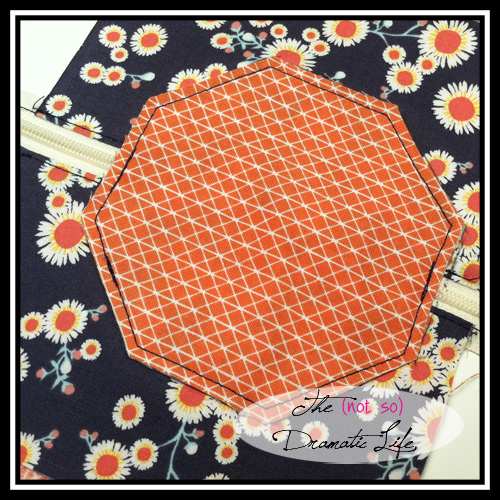
Tracing the octagon onto the front of the pouch
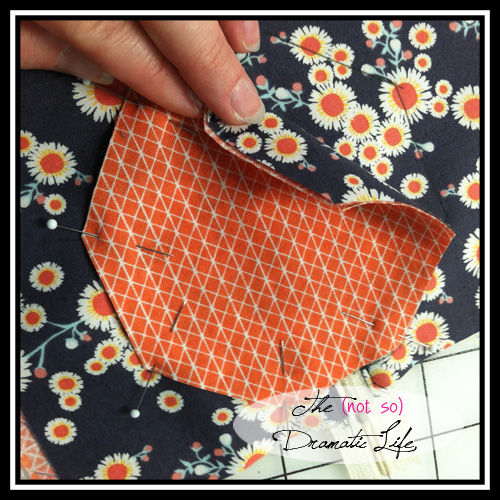
Pinning the front and back together
Stitch around the shape using a seam allowance of 1/8″
Pouch with Edges Trimmed

Pouch with clipped corners
Pouch turned right side out

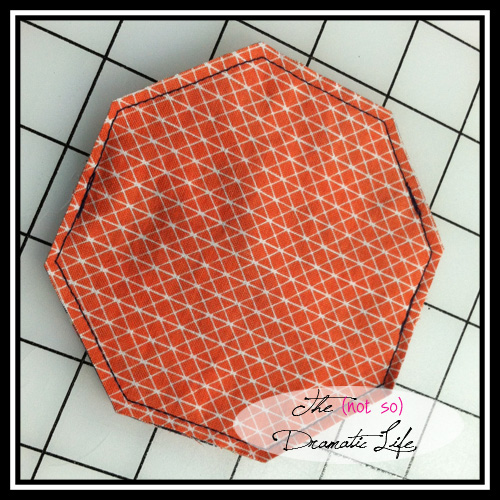
Top Stitching the Pouch
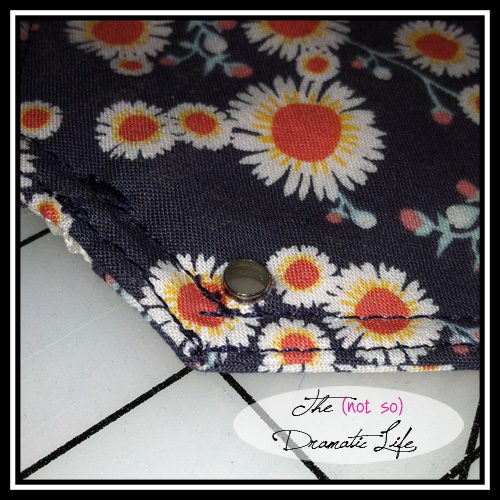
Now that everything is sewn, it is time to add the grommet. A grommet has two pieces: a grommet, and a washer. You will also need a hammer, punch, and a setter to install a grommet. I used the 00 size for this project.
Once you have decided where to place the grommet, lay the pouch on a piece of scrap wood, position the punch, and give it a couple whacks with the hammer. You should now have a nice clean opening to insert the grommet.

Top Stitched Pouch with hole punched and grommet ready to install
Grommet
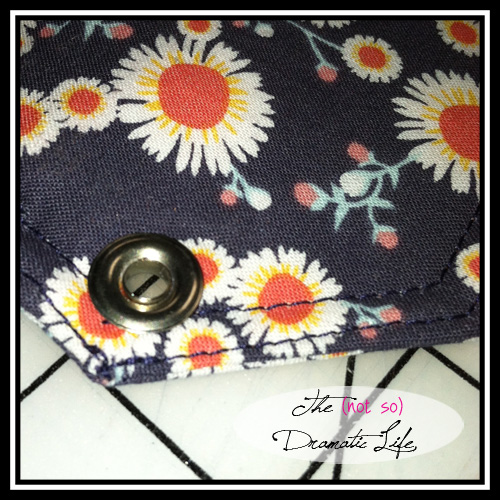
Grommet with Washer
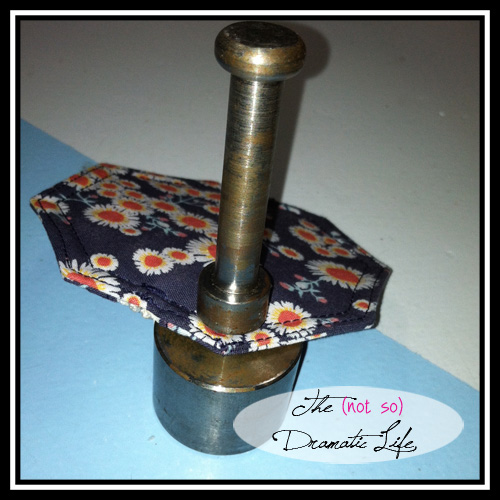
Pouch in Grommet Setter
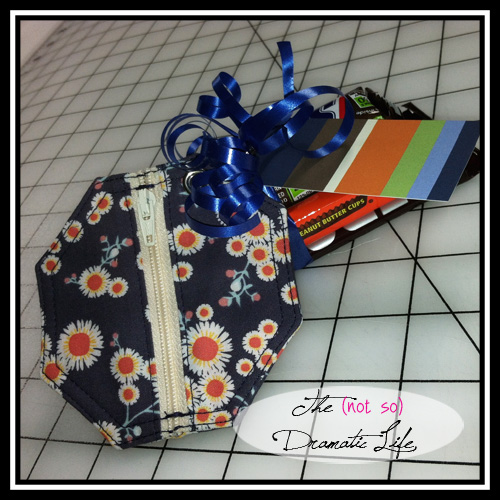
Finished Pouch, All wrapped up!
Thanks again for sharing Cassandra! I am looking forward to giving these a try in the future.
Now I hope you share what fun things you are doing with scraps this week. Here are the details for linking up:
So if you love scrappy projects, feel free to grab my button for your sidebar or posts and get ready to share all your wonderful projects from scraps. And if you have a great idea for using scraps and would like to be featured, feel free to contact me!
Now I hope you share what fun things you are doing with scraps this week. Here are the details for linking up:
- This linky party is for any scrappy project - It can be in-process or a finished piece.
- You can link up your blog post (not your homepage please) or Instagram photo from the past week that features your use of scraps.
- If you are linking to a blog post, I ask that you link back to my blog somewhere in your post. So if you are writing about scraps, just get into the habit of including a link as there will be a linky party available every week!
- If you are using Instagram, please use the hashtag #ohscrap.
- This is a party so remember to socialize and comment on the posts of others.
- Following my blog is not necessary but it sure would be great if you do!
<a href="http://quiltingismorefunthanhousework.blogspot.com/"
target="_blank"><img
src="https://blogger.googleusercontent.com/img/b/R29vZ2xl/AVvXsEg54Z8EyMCoCg0j1sBoz_APBotiRQveh32vQoL2dCSO4nQFAi8du60IuUCQp3Hb18vGD8IrM0W6_vmuufImGcr4Pf2Ve2dNIWd5LbQJfyDTRjtcekT6coT7c2nSCOG_9dvjiKGVAnuTN70/s1600/Oh+Scrap+Button.jpg"
alt="Quilting is more fun than Housework" width="125" height="125"
/></a>
So if you love scrappy projects, feel free to grab my button for your sidebar or posts and get ready to share all your wonderful projects from scraps. And if you have a great idea for using scraps and would like to be featured, feel free to contact me!
If you are interested in more ways to follow me, you can find me on Craftsy, Facebook, Pinterest, Bloglovin', Feedly, Instagram, Google +, or get my blog sent right to your email inbox by entering your email address on the right sidebar!
Linking up:
9 comments:
The coin pouches are really cute! I will definitely go check out Cassandra's blog.
These are great! Thanks for sharing. :-)
I love those little coin purses! Definitely something I will try!
These are great! Such a cool post! Love this post!
Love from www.trangscorner.com - a lifestyle, cooking, fashion blog
The coin purses are a great idea. I can't wait to spend some time on Cassandra's blog too. Thank you for posting this party too. I hadn't seen it before.
Awesome! I bookmarked this to make for my nephews since they collect coins. I'll add a special coin for them for their birthdays.
Great tutorial and I will be linking up soon with my next scrap quilt or project.
Those are the cutest - I'm going to have to make some now...and the fabrics - I LOVE them.
What a great linky party!! And Cassandra!! Ba-rilliant!! heading on over to follow her blog!
XX!
Ps, I just opened my Quilty, and THERE YOU WERE!!! So excited for you!!!
Post a Comment