Friday, November 30, 2012

Leftovers

I love leftovers!

One of my favorite activities is to use scraps and leftover fabric or blocks from a project and see what I can make from them.  Sometimes, I challenge myself to come up with designs using the pieces as they are cut.  Or I will try to use up all the fabric in a pile.  I can spend hours coming up with various ideas and layouts.


A good friend of mine made the quilt top shown on the left (lovely huh!) and gave me all of her scraps from the project thinking I might be able to get a baby quilt out of it.


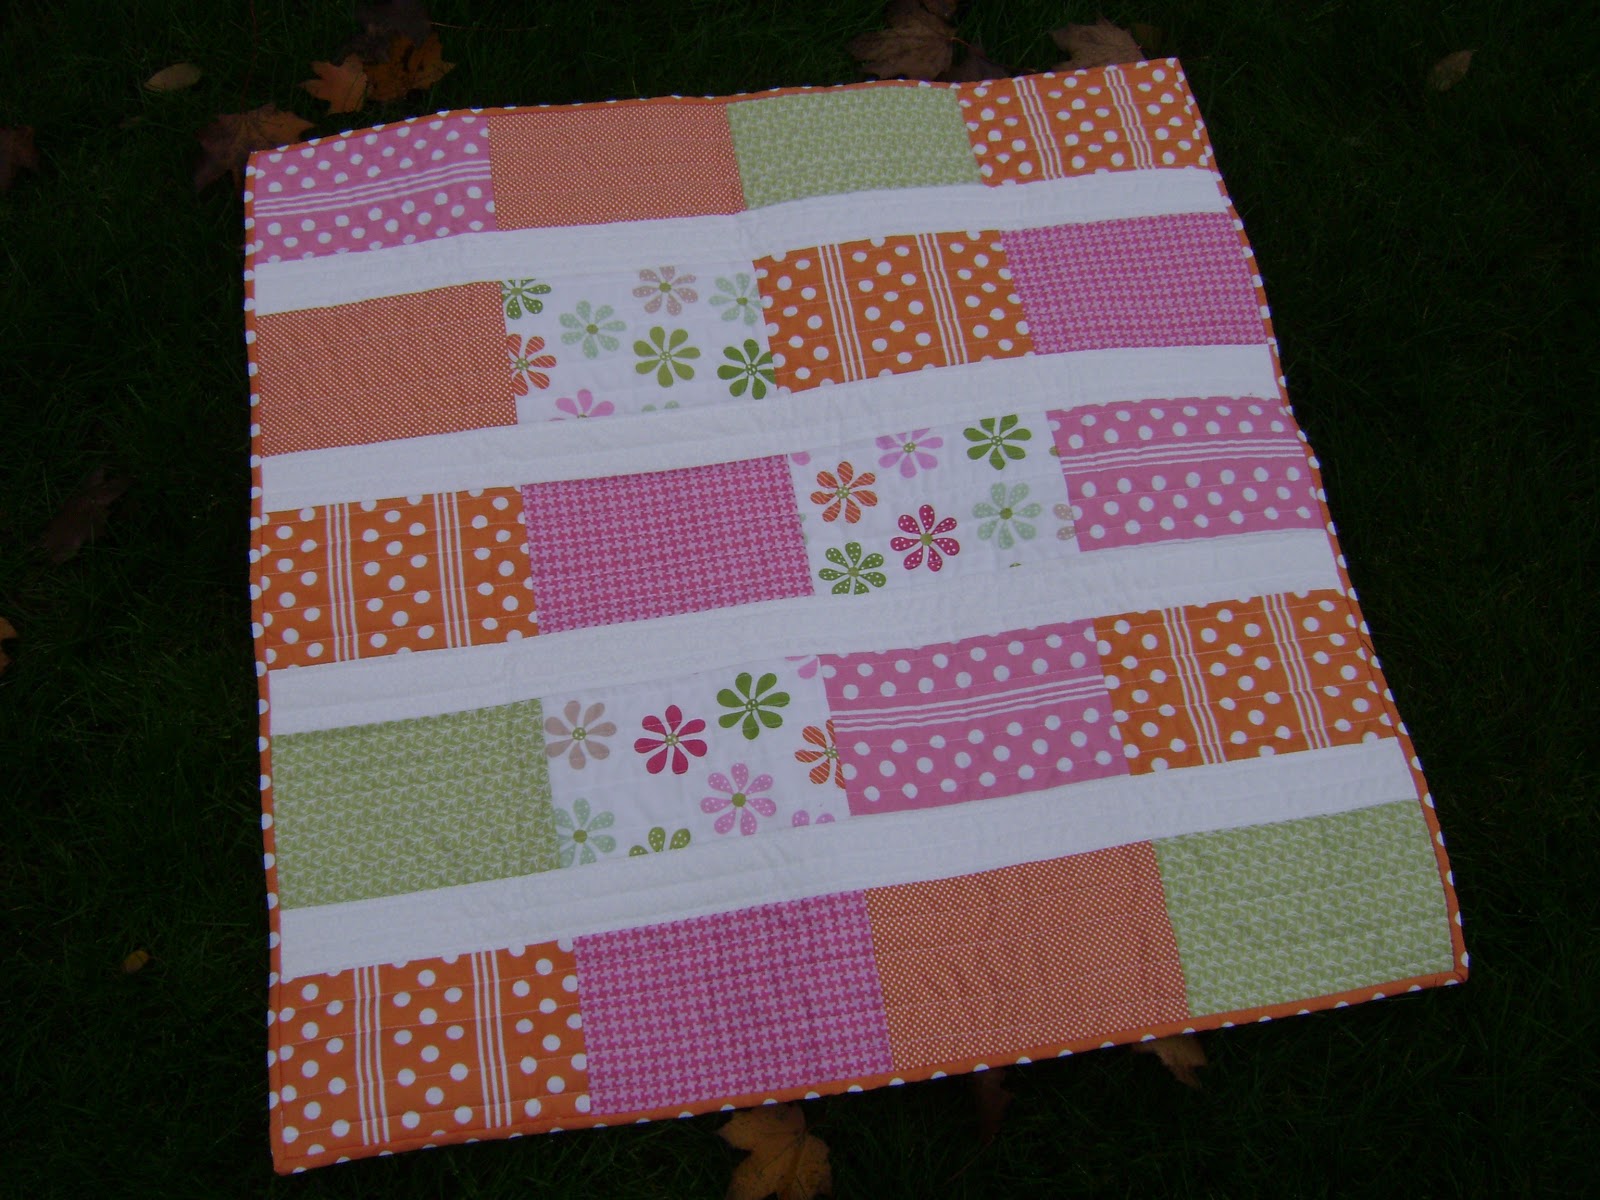
 I started with some various widths of fabrics and made this little quilt.  Liked the idea but I think I would make additional cuts and break up the pattern more next time. 

With the generous gift of fabrics, I was also able to use leftovers to complete the entire back.


 ...but there was more.  So I made this quilt using pieces that were already cut into the big blocks that are pieced down the center.  I did pull a small amount of white from my stash but from the leftovers, I was able to both border and back this charming baby quilt.


  ...and to use up the last little bits, I made this sweet quilt which is my favorite.  I love how the fabric direction and placement add to the level of playfulness.  I did have to use some of my own white fabric for the sashing and most of the backing but I more than met my objectives.


...and I am so pleased to say there was very little fabric left.  I'm sure these will find their way into a string quilt in the future.  Thanks for the fun my friend!


Sunday, November 25, 2012

A Finish!


Yippee - I was finally able to finish this twin size quilt and get it listed on my Etsy site. With the holidays hurtling towards us, I have been so busy quilting up everyone else's projects, I haven't been able to get many of mine done.

I truly love the bright colors in this!


I really had to stretch the fabrics to get a back that would be large enough but I was determined not to buy any fabric for this quilt!

This project was a whole lot of fun to work on and it really used up a number of odd bits of fabrics from my stash.


Hmmm....Maybe there can be some fabric purchases in my future now that I've made some space.


Monday, November 12, 2012

Cut Twice - Sew Once


 I have always wanted to try a project that has been in my head for quite some time.  My curiosity finally got the best of me and I decided to give it a try.  It was new and different and definitely something I will be doing again in the future.


I collected up my supplies (3/8" bias tape maker, Best Press, and lightweight double sided fusible web).  For fabrics, I grabbed some orange and gray out of my stash and some white for an accent.  For this project, I cut the white fabric into 1" strips to run through the bias tape maker (apply Best Press to the fabric before making into the bias tape so it will hold its shape) and I cut the gray and orange fabric into 7" x 14" rectangles.  I then cut 1/4" wide strips of the fusible and ironed it onto the back of the assembled bias tape.

Once I decided on the fabric order, I overlapped two adjoining fabrics about 2" on my cutting board and made a single slice with a rotary cutter so each piece was cut at the same angle. 


Once all the pieces were cut, I layered the project onto the backing and the batting.  I overlapped the cut wedges about 1/2".  I then took the entire piece to the ironing board.


I trimmed my bias tape slightly longer than the width of the runner and pressed it over the raw edges of the wedges with an iron, adhering the fusible to the project.  I also kept applying alot of heat to warm the entire project all the way through the batting and backing.  The heat will cause all of the layers to somewhat stick together so you don't have to pin the project to quilt.


Once I had everything in place, I carefully moved the project to my sewing machine.  With a walking foot, I stitched down both sides of the bias tape, which also quilts the project as you go.
I added a few more quilted lines and a binding and the project was completed.  I'm really pleased with how it turned out.  I'm thinking this would be a great process for some simple placemats or super fast potholders - both of which are in my very near future.

If you really like this table runner, it is for sale at a very affordable price.  I also have another example here where I cut the pieces in a curve.  To see some examples of projects made by others, click here.  I hope you give this a try and see how easy it can be.

Tuesday, November 6, 2012

Project:Quilt

Early last spring I started toying with the idea of leading a sewing group.  I wanted to create an opportunity for members to learn new piecing techniques, try out various aspects of quilting (like applique, paper-piecing, etc.) and challenge themselves with occasionally working outside their box.  I wanted a venue where creativity could occur without creating a situation where a bunch of UFOs were started to clutter everyone's sewing rooms.  The idea of giving was important to me so Project:Quilt was founded.

There are 12 women who meet once a month at Our Sewing Room.  Each month, a member of the group agrees to sponsor the project.  This sponsor then gets to choose the activity, they choose the organization that receives the finished project, they are responsible for getting the project to a finished form and they get to choose how much control they have in the materials that get used for their project.  After a few initial projects that focused on some basic sewing, cutting and pressing skills, we were ready to spread our wings...

So far the quilts have been amazing!  Here are just a few...


This wall hanging was made for Reaching Out Mentoring Program.  The sponsor supplied the black fabric to unify the quilt and everyone else provided the solid colors for their block.  I love the personality each word projects.  It is hanging in their Mentor Center at Lincoln Middle School for both the students and the mentors to enjoy.


This fun lap quilt was made for a fundraiser supporting the Lane County Sheriff's Office K9 Unit.  The sponsor supplied the unifying navy blue fabric and everyone else brought dog themed fabrics for their blocks.  We used Kate Conklin's fussy frames tutorial (found here) as a guide to make the blocks (we did make a slight change to her pattern to make the blocks square).

The fundraising event has not been scheduled yet so this quilt could still be yours...


In this activity, we learned how to make 3D geese and pinwheels.  As the sponsor was donating this to a fundraising auction for Eugene Vocal Arts Ensemble, she donated her vast collection of music themed fabrics.  Rather than a large quilt, a striking bed runner was made.


You can follow all of our projects on our Flickr site - just follow the widget on the right.  Each monthly activity is organized and captured through its completion.

If you are interested in starting a group of your own, feel free to contact me.  I am more then happy to assist you with the details.

Thursday, November 1, 2012

Bits and Pieces


Just like most quilters, I always end up with odds and ends of fabric in my stash.  These consist of tiny bits left over from previous projects and other stray pieces that never seem to find a home.  On a regular basis, I try and pull some of these fabrics and make something only using what I have and not purchasing too much to complete an entire quilt.  


For October, I decided to address the odd bits of fabric I had that were bright colors on a black background.  Many of these fabrics I have had for years and it was time they went.  I chose to also take this opportunity to clean out my solids and move out some of the smaller pieces.


 For the block, I decided to pair up alike solids and sew a simple square in a square (in a square) block. 

 You know, for someone who doesn't like pink, I always seem to have alot of it.


 The amount of fabric on hand dictated how many blocks of each color I could make.  As I ran out of a solid, I mixed up the combinations to get enough blocks for a twin size quilt.

I needed a few little blocks as fillers for the design I had in mind and...


 I really like how the top turned out.  I designed it so there was virtually no matching of seams, so it went together very quickly and easily.  Now I just have to piece the back - which may turn out to be an engineering marvel as I am really short on fabric so it will need to be highly planned and pieced.  
Then onto the quilting....

Stay tuned for pictures of the finished project.

01 09 10