Friday, November 28, 2014

Scrap-A-Palooza! Quilt #11 Finish

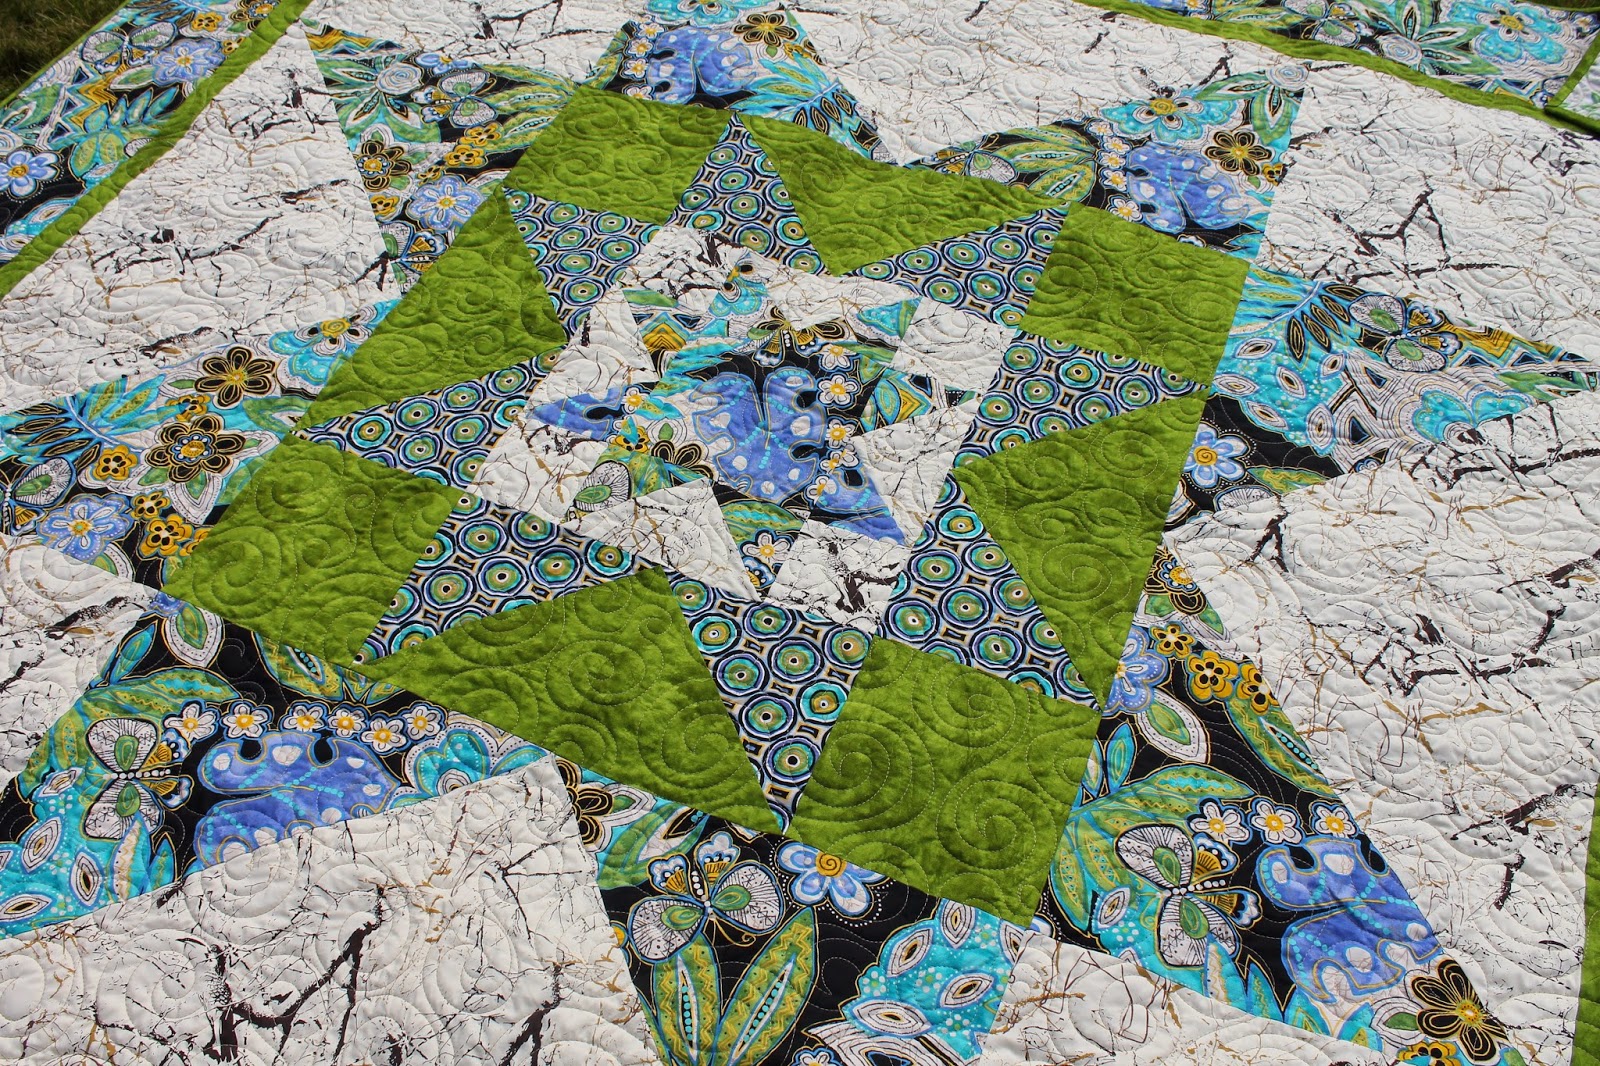
I hope those who celebrate had a wonderful Thanksgiving filled with family, friends and good food!  I am still trying to digest all the wonderful food I ate.  But I bet I will still find some room today for leftovers!

Before the holiday, I was able to get this month's Scrap-A-Palooza quilt onto my quilt frame and finished up. But before I show you the finished quilt, I want to review the steps that got us to this point.


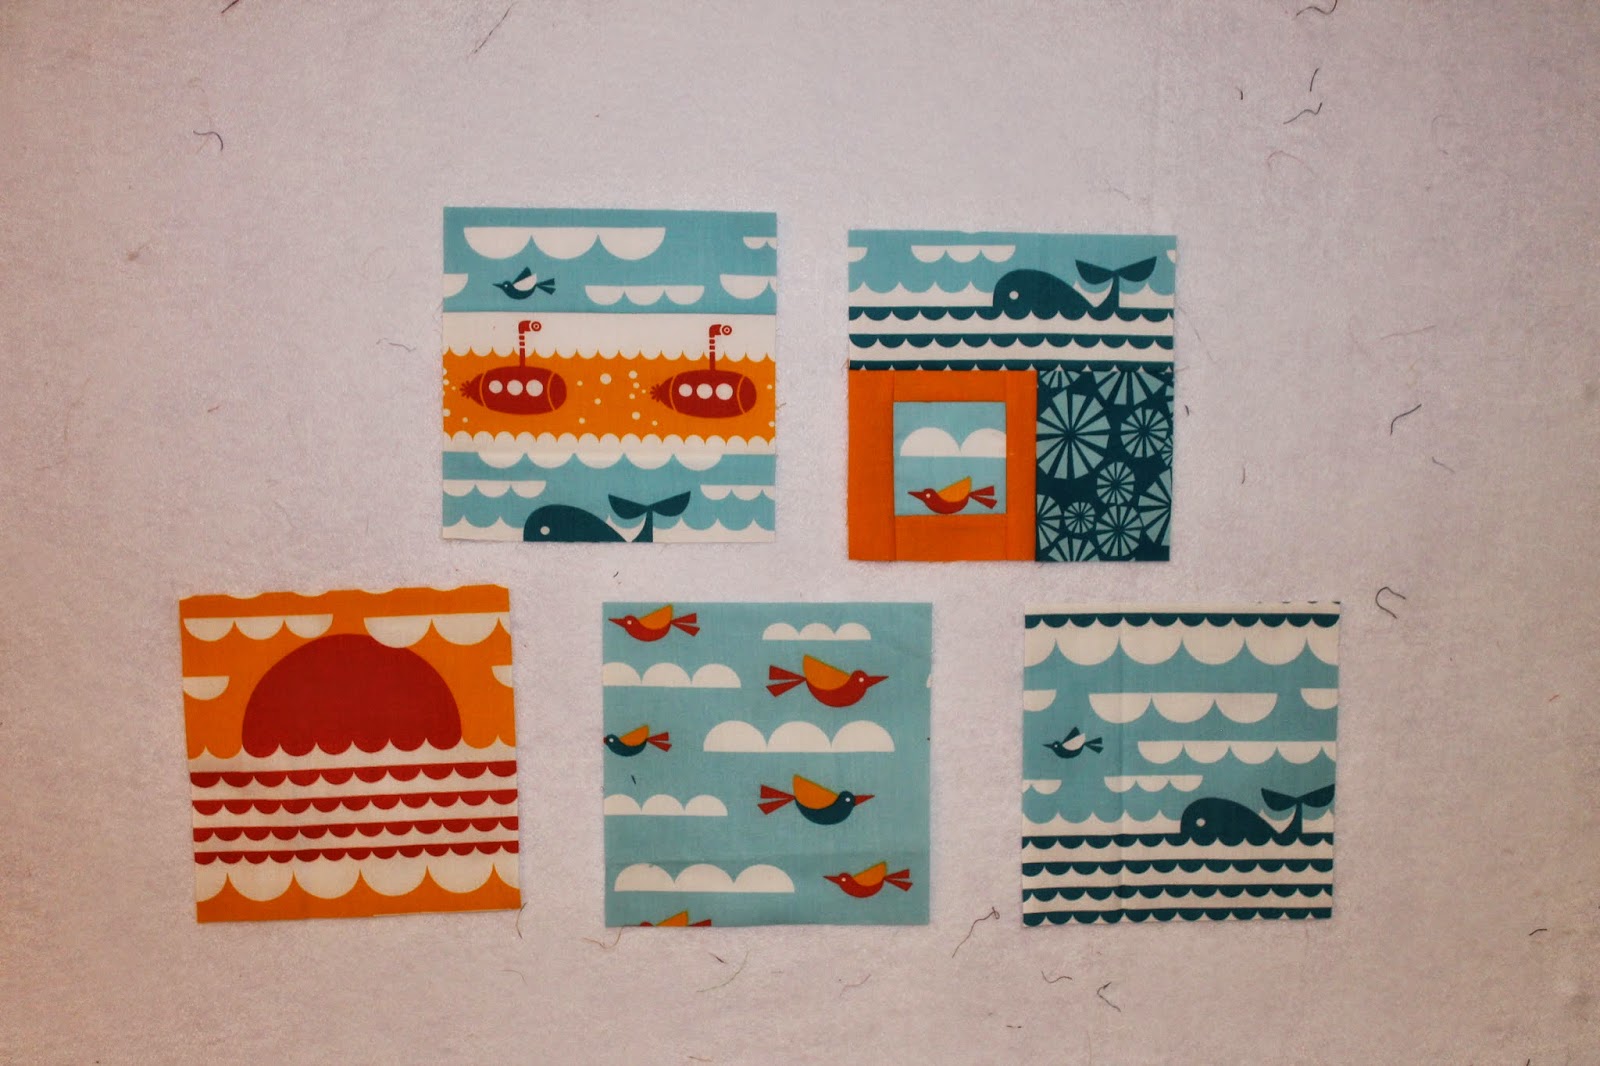
The inspiration for this quilt was some leftover fabrics I had from some previous baby quilts.  In Part One of this quilt, I shared my desire to make an improv quilt using a simple method to ensure all the pieces went easily together.


In Part Two, I shared how how I was sewing the blocks together.  The whales, submarines and birds in this fabric sure made the piecing fun!


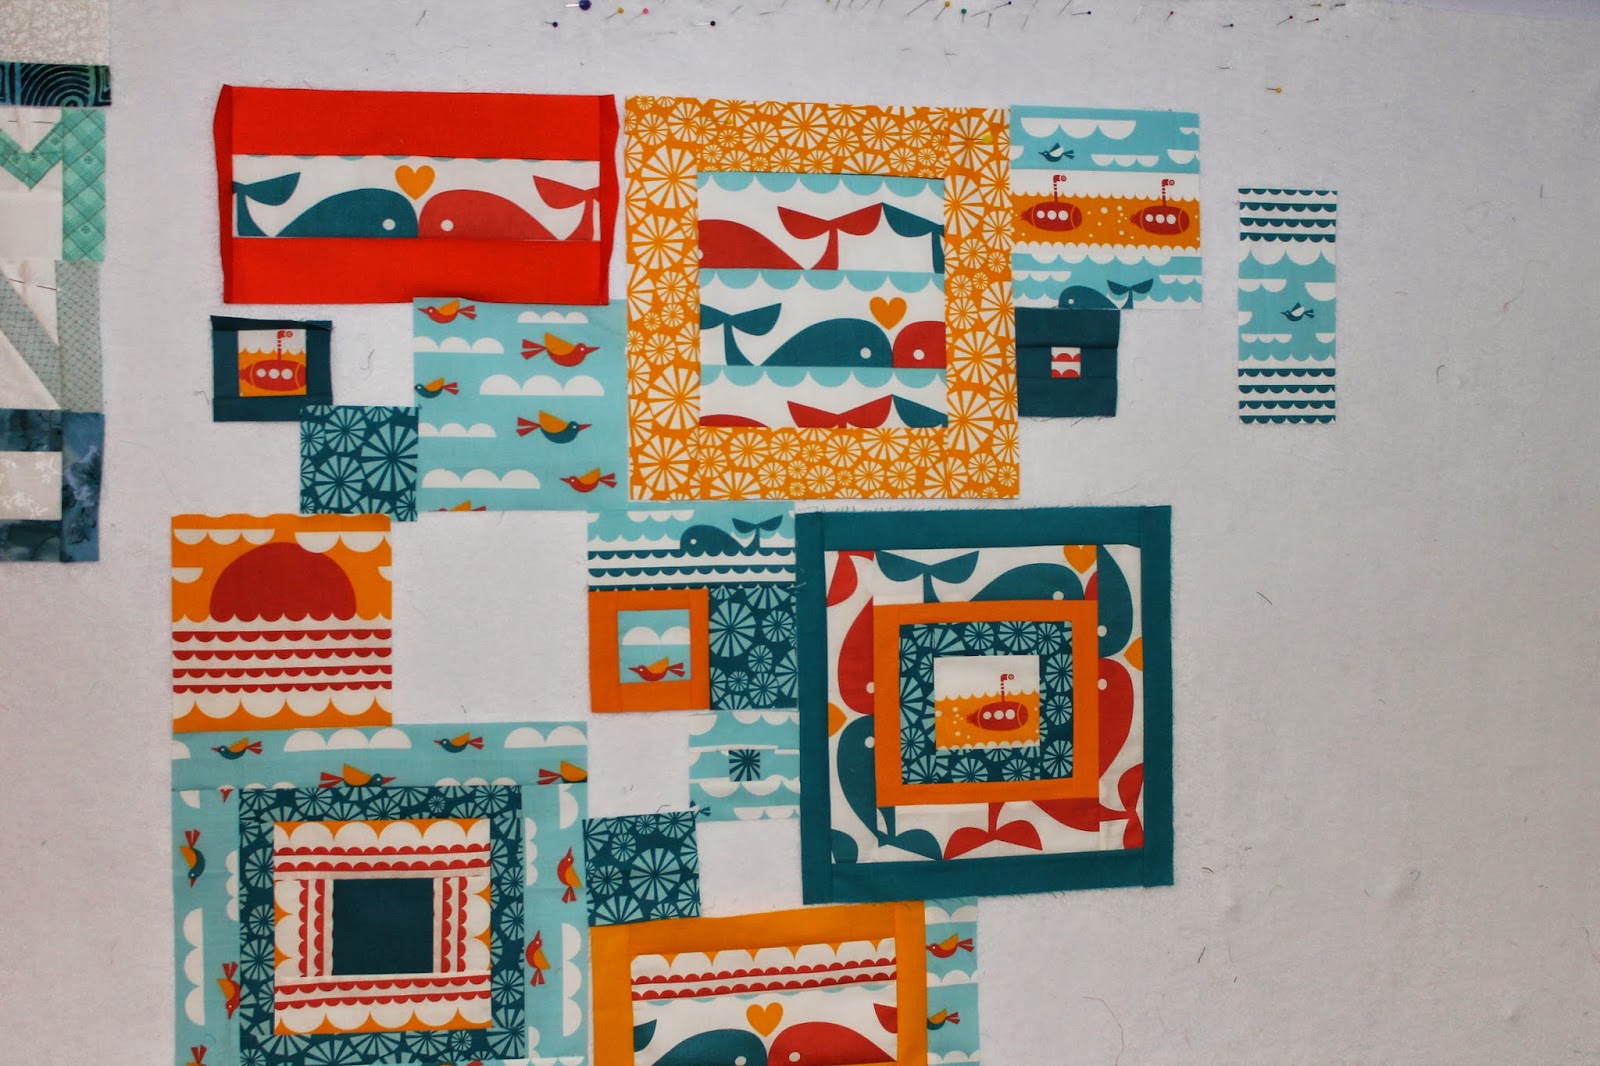
Last week, I explained how to break down the quilt into components for sewing.  In no time the quilt top was finished.


And here is the finished quilt!  The weather actually cooperated for a few minutes so I could snap some outdoor pictures.  Of course the ground was wet but it is Oregon and we are used to that!


For the quilting, I went with a simple little wave design.


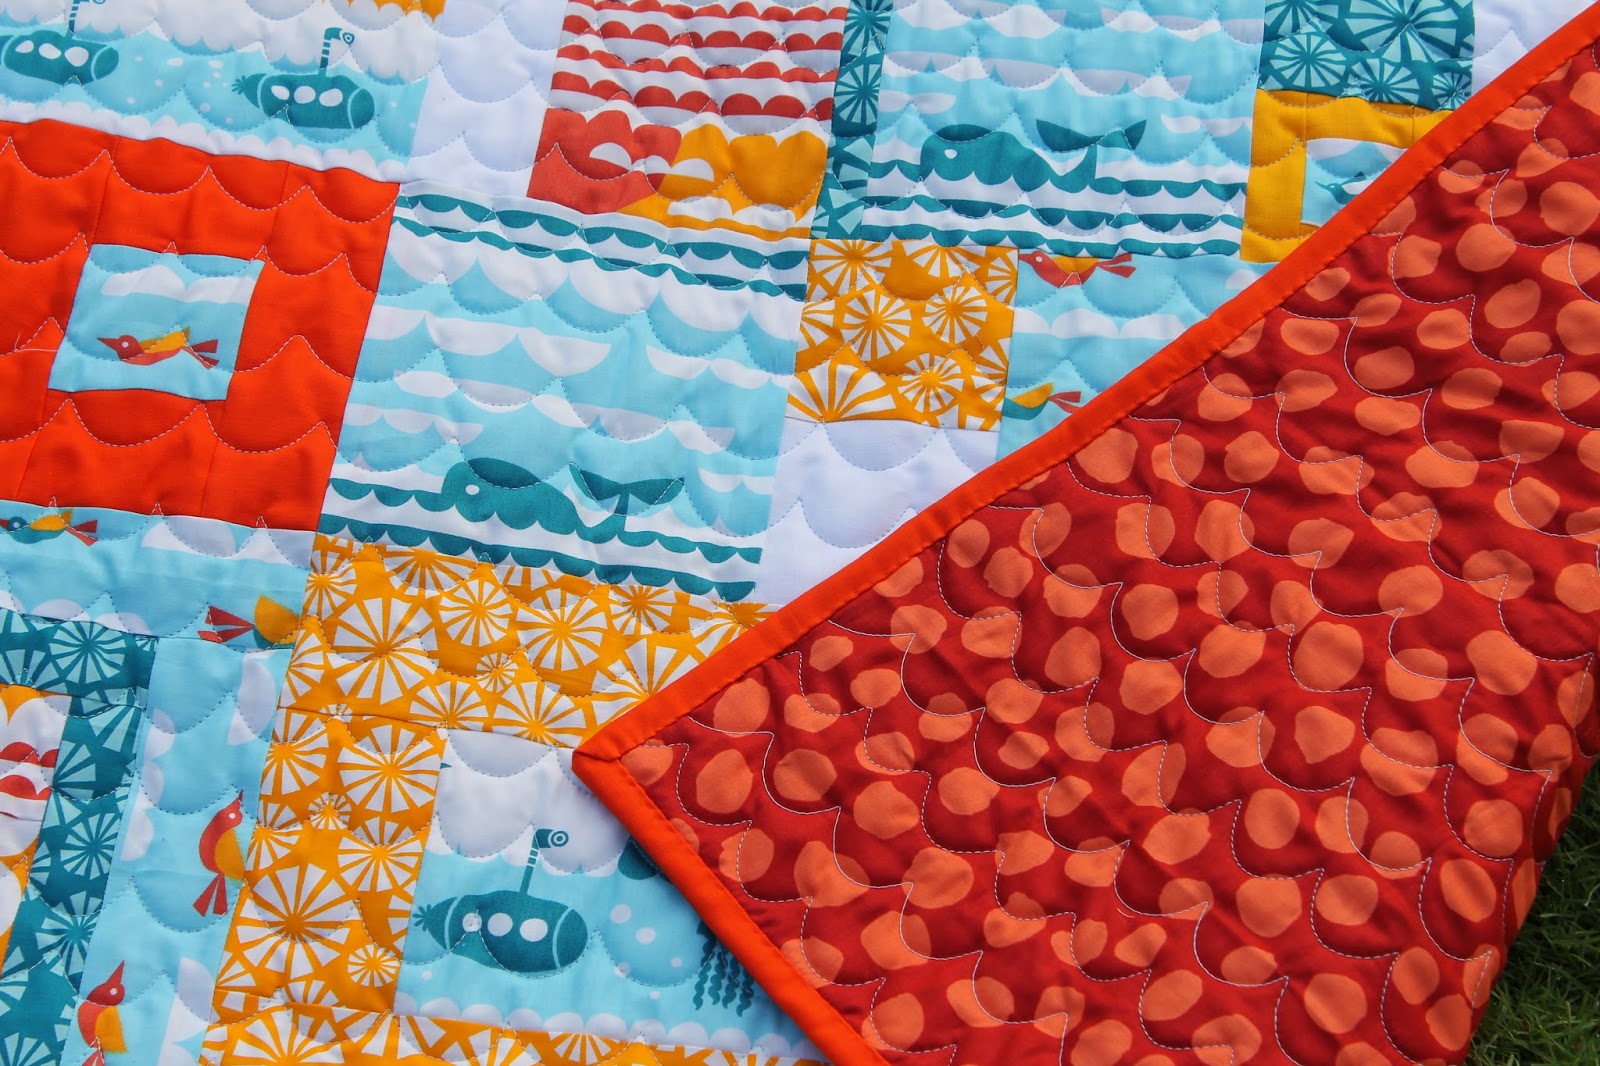
And for the backing, I found a great Brandon Mabley print in a dark orange hiding in my stash.


The fabrics in this quilt top are by Dan Stiles for Birch Organic Fabrics.  The line is Marine.  The solids are all Konas in varying shades of orange and teal with a bit of white thrown in.

This quilt is 39" x 48".
The following block sizes were made for this layout:
4 - 12.5" Square
16 - 6.5" Square
33 - 3.5" Square
4 - 6.5 x 12.5 Rectangle
1 - 3.5 x 9.5" Rectangle

Can you believe that December is right around the corner....Yikes!
 

If you are interested in more ways to follow me, you can find me on Craftsy, Facebook, Pinterest, Bloglovin', Feedly, Instagram, Google +, or get my blog sent right to your email inbox by entering your email address on the right sidebar! 
 
Linking up:
 

Sunday, November 23, 2014

Cornerstone Choices

With the patterns for the alphabet blocks being released out to the letter W (at Temecula Quilts), I am starting to see the light at the end of the tunnel on my three quilts.  While I am still only up to the letter U, I am starting to finalize how I am going to finish each one up.


Here is how the blue one looks all laid out on the design wall.  I plan on making some sort of quilt block spacer for the open areas.


I am going to use up a bunch of solid white scraps for all the sashing but I plan on adding some colorful cornerstones.  Here is where you can help me out.  I have three choices and I like them all for different reasons.  

1. Orchid purple shot cotton: I like that it brings out the subtle purple in some of the blocks but I am concerned it will draw the eye too much.

2. Teal solid: I like this color with most of the blocks.  To me though, it just seems a bit boring.

3.Gray/white hourglass block: I have a bunch of these blocks already trimmed to 2" so they can be easily added.  I still plan on using white for the sashing so would the pieced blocks be distracting?

I would love to hear what you think!


If you are interested in more ways to follow me, you can find me on Craftsy, Facebook, Pinterest, Bloglovin', Feedly, Instagram, Google +, or get my blog sent right to your email inbox by entering your email address on the right sidebar! 
Want to Play Along?Linking up:

Friday, November 21, 2014

Unloved Fabric + Giant HSTs = Fast & Easy Quilt

I don't know why I cannot seem to just get rid of fabric that I have fallen out of love with.  Maybe it is the impression my grandparents, who grew up during the depression, made on me but I feel I must sew up the fabrics I have.


And as my goal was to sew up old stash this year, I thought I would grab one of the last big stacks of fabrics that has been taking up space and sew it into a quilt.  All told, I had about 10 yards of fabric in these four prints - guess it is going to be a big quilt!

Jasmine over at Quilt Kisses has recently made some giant star quilts that I loved and she inspired me to make something similar from these fabrics.


Because of the number of prints I was using, I couldn't use the same design as Jasmine.  But I liked the idea of using giant HSTs to create a big star and get this quilt together quickly. So I settled on a star in a star in a star design.


The outside HSTs are 16".  I knew I would need that big 16.5" square ruler I bought myself earlier this year!  The quilt top really went together easily and the fabric quanties I had were almost as if I had bought them to make this quilt.


I knew this quilt was going to go directly into my Etsy shop so I really didn't want to go buy backing fabric for it.  I don't normally keep fabric pieces big enough for a queen size quilt so I had to make a piece I had work by adding in some leftover fabric from the top.


 I had to use up every scrap of fabric I had left to make it work.  But when you are determined to not buy fabric, you get pretty creative!

Not a bad finish for just a weekend!  I spent this week hand sewing up the binding and now I can cross this one off the list.

So what about you - are you able to pass on unloved fabric or are you like me and feel a need to sew it up yourself?  I will say this year has sure changed my fabric buying habits!


If you are interested in more ways to follow me, you can find me on Craftsy, Facebook, Pinterest, Bloglovin', Feedly, Instagram, Google +, or get my blog sent right to your email inbox by entering your email address on the right sidebar! 
 
Linking up:
 

Wednesday, November 19, 2014

Scrap-A-Palooza! Quilt #11 Part Three

I know I have been a bit silent on my blog lately.  It is that time of year where I am busily quilting up a number of clients holiday projects so my schedule is pretty tight.  By the end of each day, I just don't seem to have much energy to sew or sit at my computer.  Luckily I only had to quilt half a day today so I thought I had better share my progress on this month's Scrap-A-Palooza quilt.

Last week I shared how I was constructing the blocks for this quilt.  This week, I will walk you through how I assembled the quilt top.

The first thing I did was determine the size I wanted the quilt top.  Because I was using combinations of 3" to make my blocks, I needed to choose a width and length that was divisible by three.  I settled on 39" wide x 48" long. Then I needed to break up the quilt into components that could be easily sewn together.  I decided to work the quilt in three sections.  
The first 12" x 39", the second and third both 18" x 39".


Starting with the top section, I laid out some blocks to fill the space.  Remember, all my blocks are made so each side measures 3.5", 6.5" or 12.5" unfinished.  As I laid out my blocks, sometimes I would re-make some to spread certain colors throughout the piece.


Next, I need to sew up the sub-components.  In this row, I formed four of these.


Then it is just a matter of sewing those sub-components together.


The second row is a bit more complex.  Once you get your blocks where you want them, you need to identify the sub-components.  You are really just looking for the natural breaks in the blocks. 


I settled on these three sections.


Here it is all sewn together.


I went through the same process for sewing up the third and final row.  This one I also broke into three sub-components.  Can you see them?  Now it is easy to see the next step of simply joining the rows together to finish up the quilt top.


Here is the quilt top all sewn up.  I love the look of improv this method provides without the fuss of figuring out how to fit all the odd sized blocks together.

I love the colors and playfulness of this quilt.  And to think it was just made from some leftover fabrics from a previous quilt and some stray solids from my stash.

Doesn't it look far more involved than the simple process above?

I was able to find a bright orange fabric in my stash for the backing so it is all ready to be quilted.  With the holiday coming up, I am hoping to sneak it into the rotation.   I should be able to share a finished quilt next week!

Hope you are staying warm!!

If you are interested in more ways to follow me, you can find me on Craftsy, Facebook, Pinterest, Bloglovin', Feedly, Instagram, Google +, or get my blog sent right to your email inbox by entering your email address on the right sidebar! 
Linking up:
 

Thursday, November 13, 2014

Remembering to Play!


When your business is also your hobby, it is easy to get caught up in deadlines and forget to schedule yourself some time to simply play.  I need to remind myself constantly to take time out, turn up the radio and just let the creative juices flow.


I pieced this block a while back during a time when I really needed to find some "me" time.  Shortly after finishing it, I decided to use it for a round robin I was participating in.  I was hoping to end up with a fun wall hanging for my sewing room.


When I received the quilt top back, I wasn't disappointed.  It is always so fun to see where others take your original block.  It is sad that it has taken me so long to get it finished!


I love the four seasons represented by the trees with their cute embroidery stitches.
Cute, huh!


I now have this lovely quilt finished and hanging in my sewing room.  A constant reminder to take time out to "play" with my fabrics.


With the new year coming, maybe I should make some sort of resloution to change how I spend my time....Hmmm, I am going to have to think about that!


ALYoF2014 

This wallhanging was my November goal for A Lovely Year of Finishes with Sew Bittersweet Designs.  It is hard to believe I have finished it so early in the month! Woot! Woot!


If you are interested in more ways to follow me, you can find me on Craftsy, Facebook, Pinterest, Bloglovin', Feedly, Instagram, Google +, or get my blog sent right to your email inbox by entering your email address on the right sidebar! 

Linking up:

Tuesday, November 11, 2014

Scrap-A-Palooza! Quilt #11 Part Two


With the colder temperatures outside, I am more than happy to stay inside and work on this month's Scrap-A-Palooza quilt.  The fun colors and playful fabrics I am using this month are also helping me find my sewing mojo.  I can feel it slowly coming back!


Here is my progress so far...


This month I wanted to make an improv quilt without having to do all the quilt math to join together the blocks.  To achieve this, I am working with the magic number combinations I shared in Part One.  


I started with the 12 1/2" blocks.  While I could make the blocks from stars or any manner of block designs, I decided to go with a simple log cabin or courthouse step block.  Starting with a central focus piece, I simply sewed on varying widths of strips until I reached the desired block size.  Many finished out a little larger and I simply squared them up to finish out at 12 1/2".  You can make each block as detailed or as simple as you like.


The next blocks I made were some 6 1/2" blocks.  The three across the bottom are simply cut from a single fabric.  The two on the top are pieced.  You really can sew together the blocks in any fashion you desire - you just need to be sure they measure 6 1/2" when completed.


The really small scraps, I am sewing into the 3 1/2" blocks.  You will need quite a few of these to act as fillers when you go to construct the top (which we will cover next week).  I also plan on cutting some solid white squares to make into 4 patches with some of these pieced blocks.


And remember, your blocks don't have to be square - they just need to have the sides measure one of your magic numbers.  The two whale blocks measure 12 1/2" by 6 1/2".  I am working on a vertical block next from the bird fabric.


As I finish each block, I have been placing it up on my design wall.  This will help guide you on what sizes and colors are needed.  I want my quilt to finish at about 42 by 48".  My next step is to probably add in some solids to help break the chaos up a bit.

I am really enjoying playing with these adorable fabrics!  
I hope to find some time this afternoon to make some more.

Hope you are finding time to spend on those things that make you happy!


If you are interested in more ways to follow me, you can find me on Facebook, Pinterest, Bloglovin', Feedly, Instagram, Google +, or get my blog sent right to your email inbox by entering your email address on the right sidebar!

 
Linking up:
Freshly Pieced
she can quilt (Scraptastic Tuesday) 


Sunday, November 9, 2014

Sunday Stash - Market Bling

Did I get some very happy mail this week!  Just before Christa (of Christa Quilts) went to market, she announced she was going to be sharing some of the samples and such she picked up at market with four of her readers.  Needless to say I signed up for a chance right away!  Imagine my joy when I found out I was one of the winners.   I was even happier when I saw how big and the package was.  
Thanks so very much Christa!!!


There were thread samples from Coats and Aurifil


A great bag pattern from Sara Lawson of Sew Sweetness.


Lots of great fabrics in all sorts of sizes and prints.  Each and every one are going to be put to good use.  I especially loved the mini charms of the Kona Solids, Moda's Feed Company (swoon) and More Hearty Good Wishes (also by Moda).  The little fat quarter bundle of AMB solids was pretty nice too!


 And there was also some other fun samples of products and a Moda bag (which is great because I live in a "no plastic-bring your own bag" city).


Christa has a great on-line shop where she has an amazing selection of precuts and Aurifil threads.  Check it out if you get the chance!


Thank you Christa for sharing your market bling with some of your readers and all the generous companies for supplying these great items!

If you are interested in more ways to follow me, you can find me on Craftsy, Facebook, Pinterest, Bloglovin', Feedly, Instagram, Google +, or get my blog sent right to your email inbox by entering your email address on the right sidebar! 


Thursday, November 6, 2014

Some LOL to lift the Spirits!

I have been in such a sewing funk lately!  I go into my sewing room and have zero ambition to work on any of the projects waiting for me.  So when I found out I won a gift certificate at FabricsNQuilts for participating in the 4th Annual Scrap Quilt Challenge, I decided to buy some fun charm packs and make another Charm Pack Cherry quilt.

I chose the bright colors and fun prints of the LOL line by Me & My Sister Designs.  A simple quilt pattern in playful prints would hopefully motivate me to get my creative groove back.


Once I found some time to sew, in no time at all I had the quilt finished!  


The LOL collection worked really well with the pattern.  I did kick out the stripes and a few of the pieces with a white background.


 But they worked perfectly on the back where I needed a bit more fabric because the backing I was hoping to use just wasn't quite big enough.


If you remember, I made this pattern once before with the Twenty Three line and some Kona Ash.  However, I messed up the pattern and sewed a few blocks together incorrectly. It is hard to say which layout I like best!

The Charm Pack Cherry Quilt is free pattern from the Fat Quarter Shop. This quilt was the perfect project to help me find my sewing mojo!


If you are interested in more ways to follow me, you can find me on Craftsy, Facebook, Pinterest, Bloglovin', Feedly, Instagram, Google +, or get my blog sent right to your email inbox by entering your email address on the right sidebar!


Linking up:
My Quilt Infatuation
Confessions of a Fabric Addict

Wednesday, November 5, 2014

Scrap-A-Palooza! Quilt #11 Part One

That's right!  Bring on the 11th Scrap-A-Palooza quilt for 2014.  You might think I am out of scraps or ideas but my mind and sewing room seems to be bursting with both!

The inspiration for this month's quilt stems from a need to get a few more baby quilts in my Etsy Shop.  I thought I would pull one of the bags of cohesive scraps I was saving and make an improv quilt.  But my problem with improv quilts is they seem to take such a long time to put together.

So I thought I would add a bit of structure in the quilt by using some magic numbers in my block sizes to make the quilt easier (and faster!) to assemble.


For the fabrics, I thought I would add a few solids from my stash to these leftover fabrics from an old project.  They are beautiful organic Birch Fabrics by Dan Stiles.

And just what are magic number blocks you ask?  Rather than create a bunch of blocks in haphazard sizes, a combination of sizes that fit together easily are used.  Some examples would be 2", 4" and 8" or maybe 4", 8" and 16".  I have decided to use a 3", 6" and 12" sequence so blocks with measurements in these combinations (even rectangles) will fit together in endless arrangements.

I will be back in about a week with Part Two where I will be sharing how I assemble the blocks.  Hope to see you then!


If you are interested in more ways to follow me, you can find me on Craftsy, Facebook, Pinterest, Bloglovin', Feedly, Instagram, Google +, or get my blog sent right to your email inbox by entering your email address on the right sidebar! 
 
Linking up:
 

Monday, November 3, 2014

A Few More Letters

 Just a quick post to share my progress on my three sets of alphabet blocks.  Not only did I get four more letters finished but I also went back and added additional sashings and backgrounds to all of the previous blocks.  So now, all three sets are up to date through the letter "N"!


 This blue/green set will be made with just white sashing between the blocks and maybe lavender cornerstones.Very simple assembly.


This set is just a scrappy mess!  I am really going to have to get creative to make them all work together in one quilt.  But the positive about these blocks is a lot of my really old scraps are finding a home!


And this set...well, I made an error as I wanted to put a thin piece of gray around the letter before I put on the backgrounds.  I realized this about 5 blocks in and wasn't about to go back and fix them.  I have a plan for quilting that will hopefully redeem the blocks.  Fingers crossed!

So I am past the mid point on these blocks!  As they are filling up the design walls, I am looking forward to getting through the rest of the letters and quilting these up.  In fact, I am off to do a bit more sewing now!  Thanks for stopping by!!


If you are interested in more ways to follow me, you can find me on Craftsy, Facebook, Pinterest, Bloglovin', Feedly, Instagram, Google +, or get my blog sent right to your email inbox by entering your email address on the right sidebar! 
Want to Play Along?Linking up:

Sunday, November 2, 2014

November Goal - ALYoF

Just two more months left in 2014!  I started out this year determined to finish up all of my old quilt tops waiting to be quilted.  When I went to the closet today to take inventory, I was happy to see I am down to just three....THREE!  I can't tell you how happy that makes me!


So I have decided to make this little wallhanging my A Lovely Year of Finishes goal for the month.  It is the last of the round robin quilts I stashed away years ago.  My plan is to hang it in my sewing room to remind me to "play" every once in a while.  

The last two quilt tops in the closet are "family" quilts.  I inherited through my family 280 Sunbonnet Sue blocks...Yep, you read that right.  Two hundred and eighty of my least favorite vintage block!  So I have been slowly sewing them into quilts and dispersing the "love" through the family.  I am down to only enough blocks for one more quilt top so the end is within sight.  I am sure I will be sharing my quilting heritage with all of you over the next few months.  I bet you can't wait!!


If you are interested in more ways to follow me, you can find me on Craftsy, Facebook, Pinterest, Bloglovin', Feedly, Instagram, Google +, or get my blog sent right to your email inbox by entering your email address on the right sidebar!
01 09 10